Week of July 16-22, 2017
If you can see it, you can photograph it.
This is Mammana's First Law of Night Sky Photography, and one that I often cite in my night sky photography workshops.
When someone reports seeing a marvelous halo around the moon or the Milky Way rising over a distant hillside, I always ask the same question: "Did you take a photo of it?" Often, this is met with a puzzled reaction. "I didn't think I could," they lament. "I don't have fancy equipment."
This brings me to another of Mammana's Laws: "It's not the camera that takes the photo; it's the photographer." The fact is you don't need fancy equipment. All you need is a camera with settings that can be operated manually (no auto anything), your user manual (Believe me, you'll need it!), a flashlight, a solid tripod and a willingness to experiment. A wired or wireless remote would also be helpful, to prevent the camera from vibrating when you press the shutter.
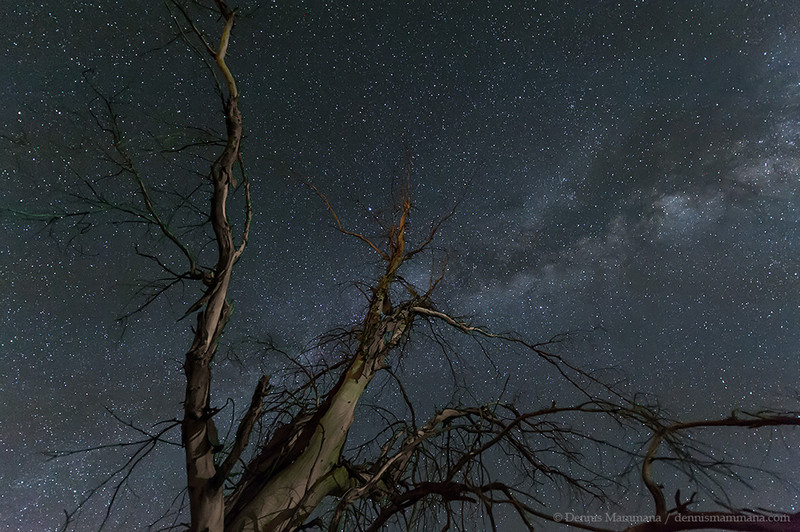
Take, for example, the accompanying image. I stepped outside one July evening and saw the Milky Way streaming beautifully over this old tree in back of my house. "What a photo that would be!" I thought. So I unpacked my gear and began a series of shots to determine a good exposure. Then, after composing the picture, I snapped a couple of keepers. Nothing fancy, but it did take a few minutes of work in the digital darkroom to make it pop.
The first thing to remember is that your camera and focus must both be set to manual mode, or M mode. With the lens focused at infinity, aim your camera skyward and take a shot. Since every situation is different, it's impossible to recommend settings, so start with something and make changes as you go.
For example, if the sky is very dark, try ISO 1600, f-stop 2.8 and an exposure of 20 seconds. If the resulting photo is too dark, make an adjustment to brighten it. Increase the ISO, or perhaps take a longer exposure. If it's too bright, adjust something to darken it. Of course, to transform the image from your camera into a photo you'd want to hang on the wall, you'll have to spend some time at the computer processing your image properly.
For exposures longer than a few seconds, you will wind up with star trails. Only the best of cameras can do this well, so I recommend that once you've got your settings right, you set your camera to continuous shooting mode, lock your remote on and let the frames click away automatically for as long as you like.
Then the fun begins. If you have a PC, visit startrails.de and download the free software called Startrails; if you've got a Mac, visit markus-enzweiler.de/StarStaX/StarStaX.html and download the free StarStaX software. Load all those single star images you just shot and, in two clicks of your mouse, you'll create a perfectly exposed star trail image.
Now that the summer Milky Way is perfectly placed in the evening sky, get out and capture the cosmos. And please drop me a note if you have any questions or wish to share your results!
Visit Dennis Mammana at www.dennismammana.com. To read features by other Creators Syndicate writers and cartoonists, visit the Creators Syndicate website at www.creators.com.


View Comments