Week of Jan. 27-Feb. 2, 2019
Most people know that the Earth's rotation causes the sun to rise in the east and set in the west. Of course, the same is true for the moon, planets and stars.
To understand what's happening, try this experiment: Stand in the middle of a room and, keeping your feet on the same spot, turn slowly from right to left. While the Earth's axis of rotation cuts through our planet from the south pole to the north pole, yours runs from your feet to your head.
While turning slowly, pay attention to the room around you. You'll notice that objects will appear on your left, drift across your field of view toward the right and disappear there, just like much of the sky we see.
Now, while continuing to turn slowly, look above your North Pole — your head. (Be careful not to fall over while doing this!) Watch the ceiling as you turn and you'll find that the spot directly over your north axis remains still, and those nearby seem to circle it without ever rising or setting.
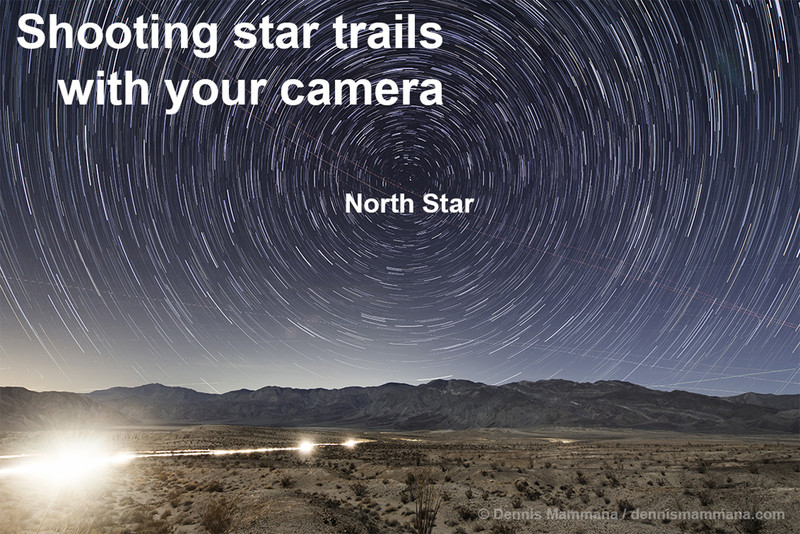
The same is true for the stars. The point directly above the Earth's north pole is known as the north celestial pole; it's marked by the north star, Polaris, and all northern stars appear to continuously wheel around it. Most of us have never stayed out for a full night to watch this grand procession, but you can effectively capture it in a photograph.
One can shoot star trails with both digital and film cameras — remember those?
With film, you'll need a camera that can be set to manual modes (exposure and focus), a normal or wide-angle lens, a locking remote control or cable release, a solid tripod and some fast color film (ISO 200, 400 or higher). From a dark location, aim your camera toward Polaris. Set your lens to around f-stop 5.6 or so. Focus on infinity, and take several exposures at "B" (bulb mode) — say, for 10, 30 or 60 minutes. When your film is processed, you should see nice star trails.
With digital it's much easier to get perfectly exposed photos, but it requires a bit of effort. After you compose and focus on infinity, take some test shots of the scene to determine a good exposure (as a starting point, try f-stop 2.8, ISO 1,600, 30 seconds). Then, with a fully charged battery and your camera set to continuous-shooting mode, lock your remote on, and let the images crank out automatically for as long as you like. When you're finished, you will likely have dozens or hundreds of images.
Here's where the fun begins. If you have a PC, visit startrails.de and download the free software called Startrails. For Mac and PC, you can also get the free StarStaX at markus-enzweiler.de/StarStaX/StarStaX.html. In just a few clicks of your mouse, you'll create a perfectly exposed star trail image.
Experiment with your exposures and the direction you shoot. Try star trail photos in all directions, and soon you'll understand just how the Earth's rotation affects all we see in the sky.
And please contact me if you have any questions or wish to share your results!
Visit Dennis Mammana at dennismammana.com. To read features by other Creators Syndicate writers and cartoonists, visit the Creators Syndicate website at www.creators.com.


View Comments