Dear James: I'm older now, and I find it difficult to hear the doorbell ring over other family sounds. Is it easy to add another chime at the other end of the house? — David R.
Dear David: Installing a second doorbell chime is an easy project you should be able handle yourself. Even with a loud standard doorbell, it can still be difficult to hear it over a television, children and pets and distinguish it from other ambient sounds.
When you go to purchase a new door chime, choose one that is a standard two-tone model. This will be easier to install because it has simple wiring. Most chimes come with wiring diagrams that show you how to attach them. Since you have only one doorbell button on your front door now, wiring it is should be easier than if you didn't have one to begin with.
You don't really have to have any electric skills to install an additional doorbell. Usually the electrical circuit for doorbells uses a low-voltage transformer. This converts 110-volt current down to 16 volts to power the chime. A low-voltage circuit such as this is safe to work with.
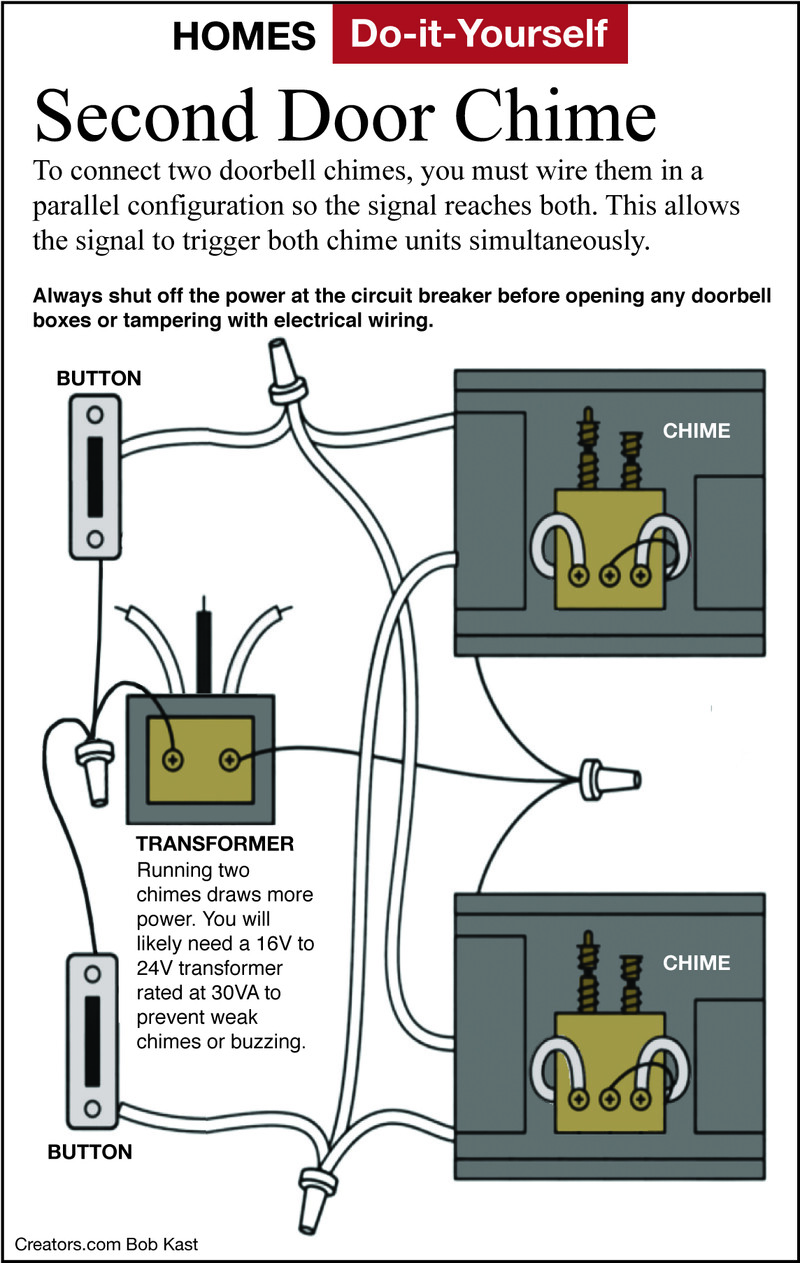
To begin, find your electrical circuit breaker box. This is probably located in your basement or utility room. You should see a small transformer near or attached to it. Look over the transformer to see its wattage rating. Usually about 10 watts is adequate for one chime. Since you want to run two chimes, you should probably replace it with a 30-watt model to power both.
Always switch off the circuit breaker that leads to the transformer. Use a circuit tester to make sure the power is off. Install the new transformer where the original one was located. Find the wires from the transformer and from the doorbell button. These will lead to the old chime. Disconnect them and attach them to the new chime.
When you take off the cover of the new doorbell chime, you may see a few sets of screws. These are for the different places chimes can be installed: front, side, rear, etc. Just use the one marked "front" for your new door chime.
Now comes the most difficult part of your job: running the wires to the new chime. Trying to get the wires through the walls is a very tedious project. Make sure you are using UL-listed solid wire, not stranded copper wire.
Once the wires are through the walls and sticking out of the hole where the new chime will be installed, prepare the ends of the wires. Next attach them to the correct areas on the chime.
Go back to the circuit breaker and turn the power on so you can test your new chime. If you have a problem with it, recheck the wiring to be sure everything is connected tightly. Since these use low-voltage circuits, clean, tight connections are necessary for the chime to work correctly.
If you are really afraid of trying to install an electrical doorbell chime yourself, you can always purchase a battery-powered wireless remote chime. With this type you can place the chime anywhere you wish. These are usually loud enough to hear anywhere in your house and extremely easy to install.


View Comments